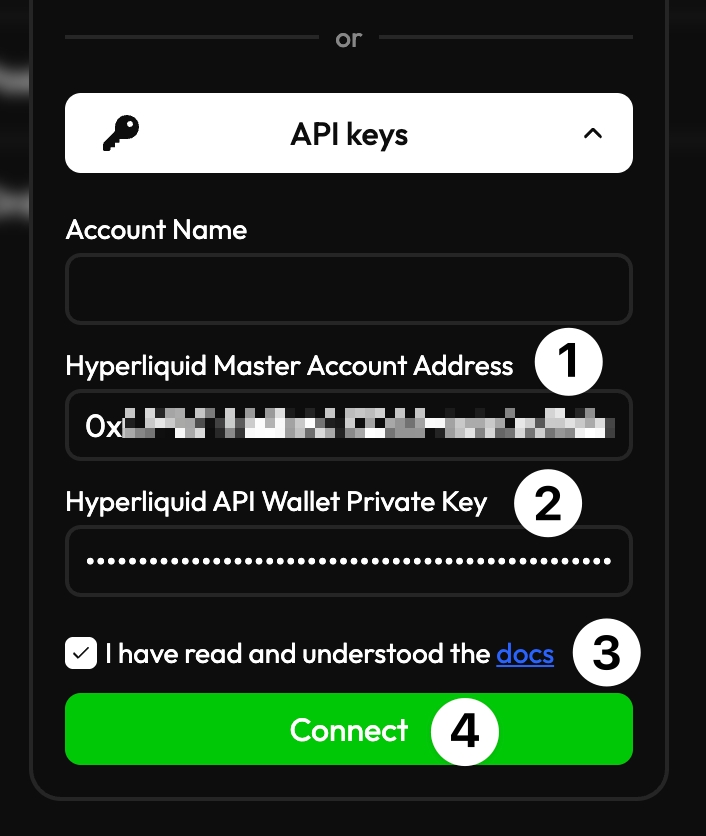
Manual Connection
Setup an API wallet for manual connection
To add a Hyperliquid account manually on Velo, navigate to the API page on Hyperliquid. You will create an API wallet on Hyperliquid which will then be used to trade on Velo.
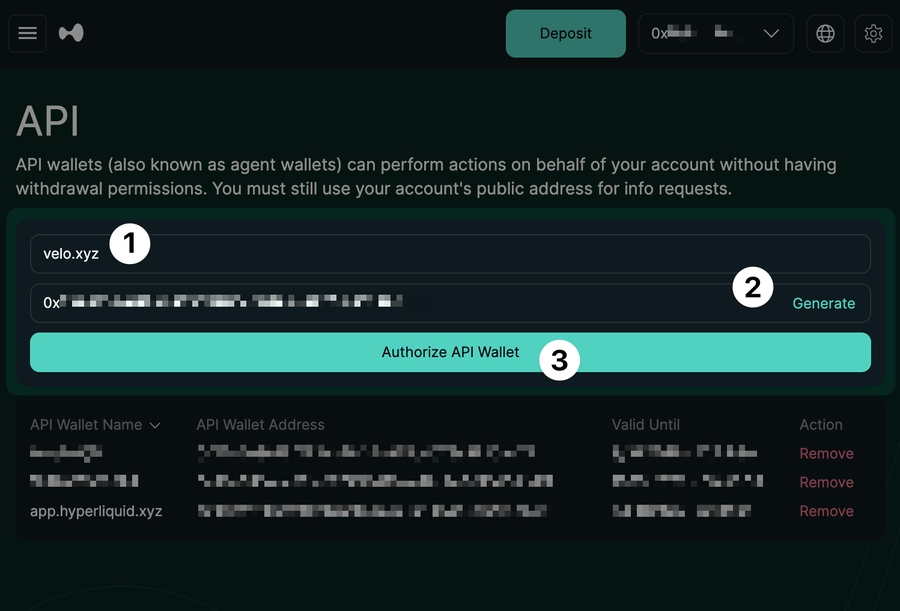
Create an API wallet on Hyperliquid
- Enter a name for the API wallet (e.g. velo.xyz)
- Generate a new wallet
- Press the button "Authorize API Wallet" which will open up a popup
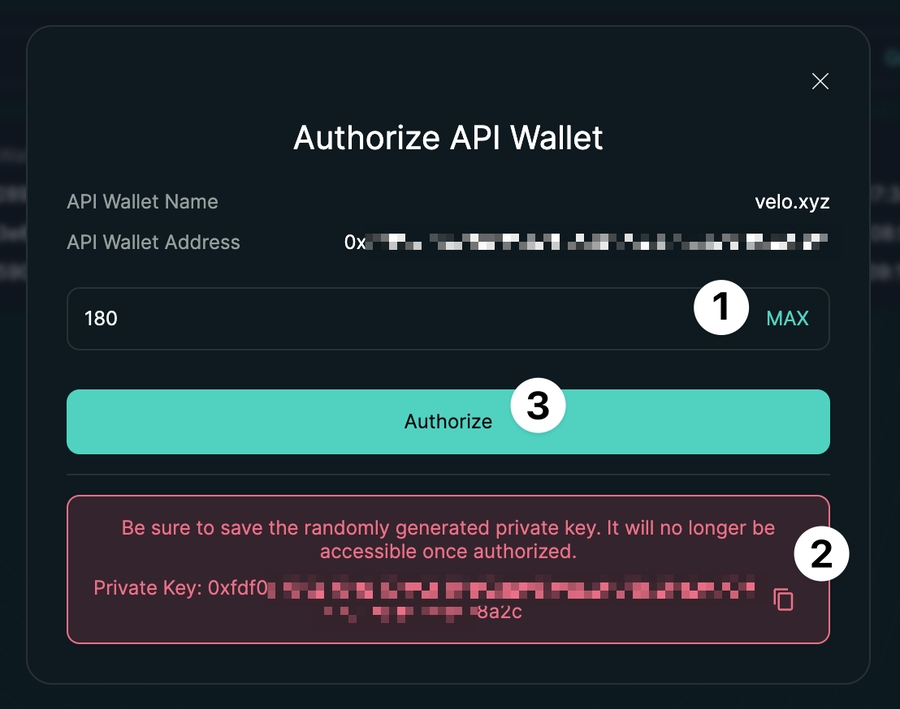
In the authorization popup
- Enter any preferred expiration date on the API wallet (max 180 days)
- Save the API wallet private key
- Authorize the API wallet (this should prompt e.g. MetaMask for a signature to approve the API wallet)
Add the API wallet to Velo
After the API wallet has been authorized, you'll need two values to enter into Velo:
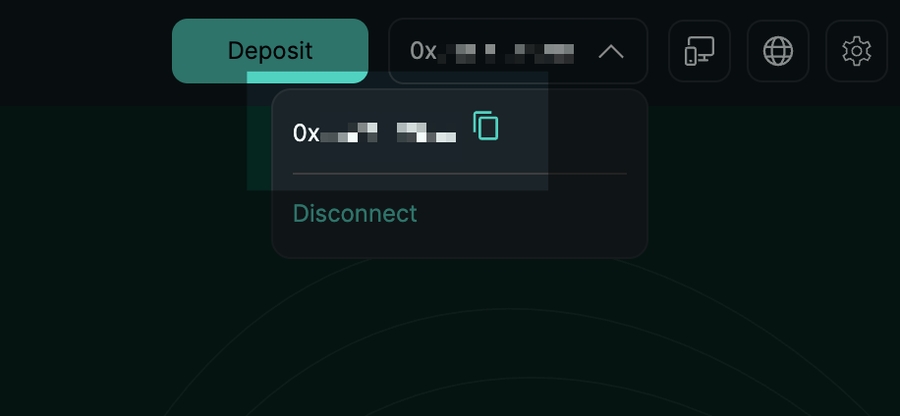
- The master account address (NOTE: not the API wallet address, this is the master account address found at the top-right of the Hyperliquid UI)
- The API wallet private key that was previously saved
Then:
- Accept the terms
- Press "Connect"